Description
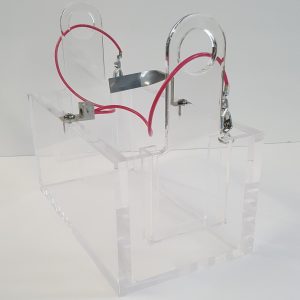
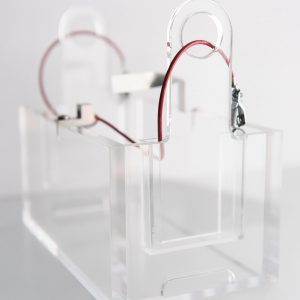
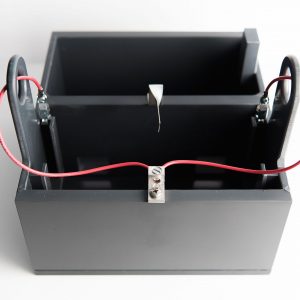
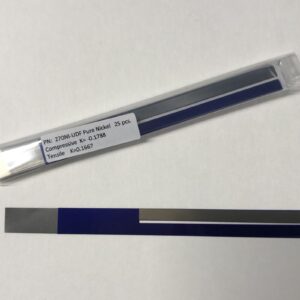
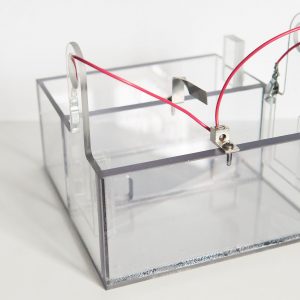
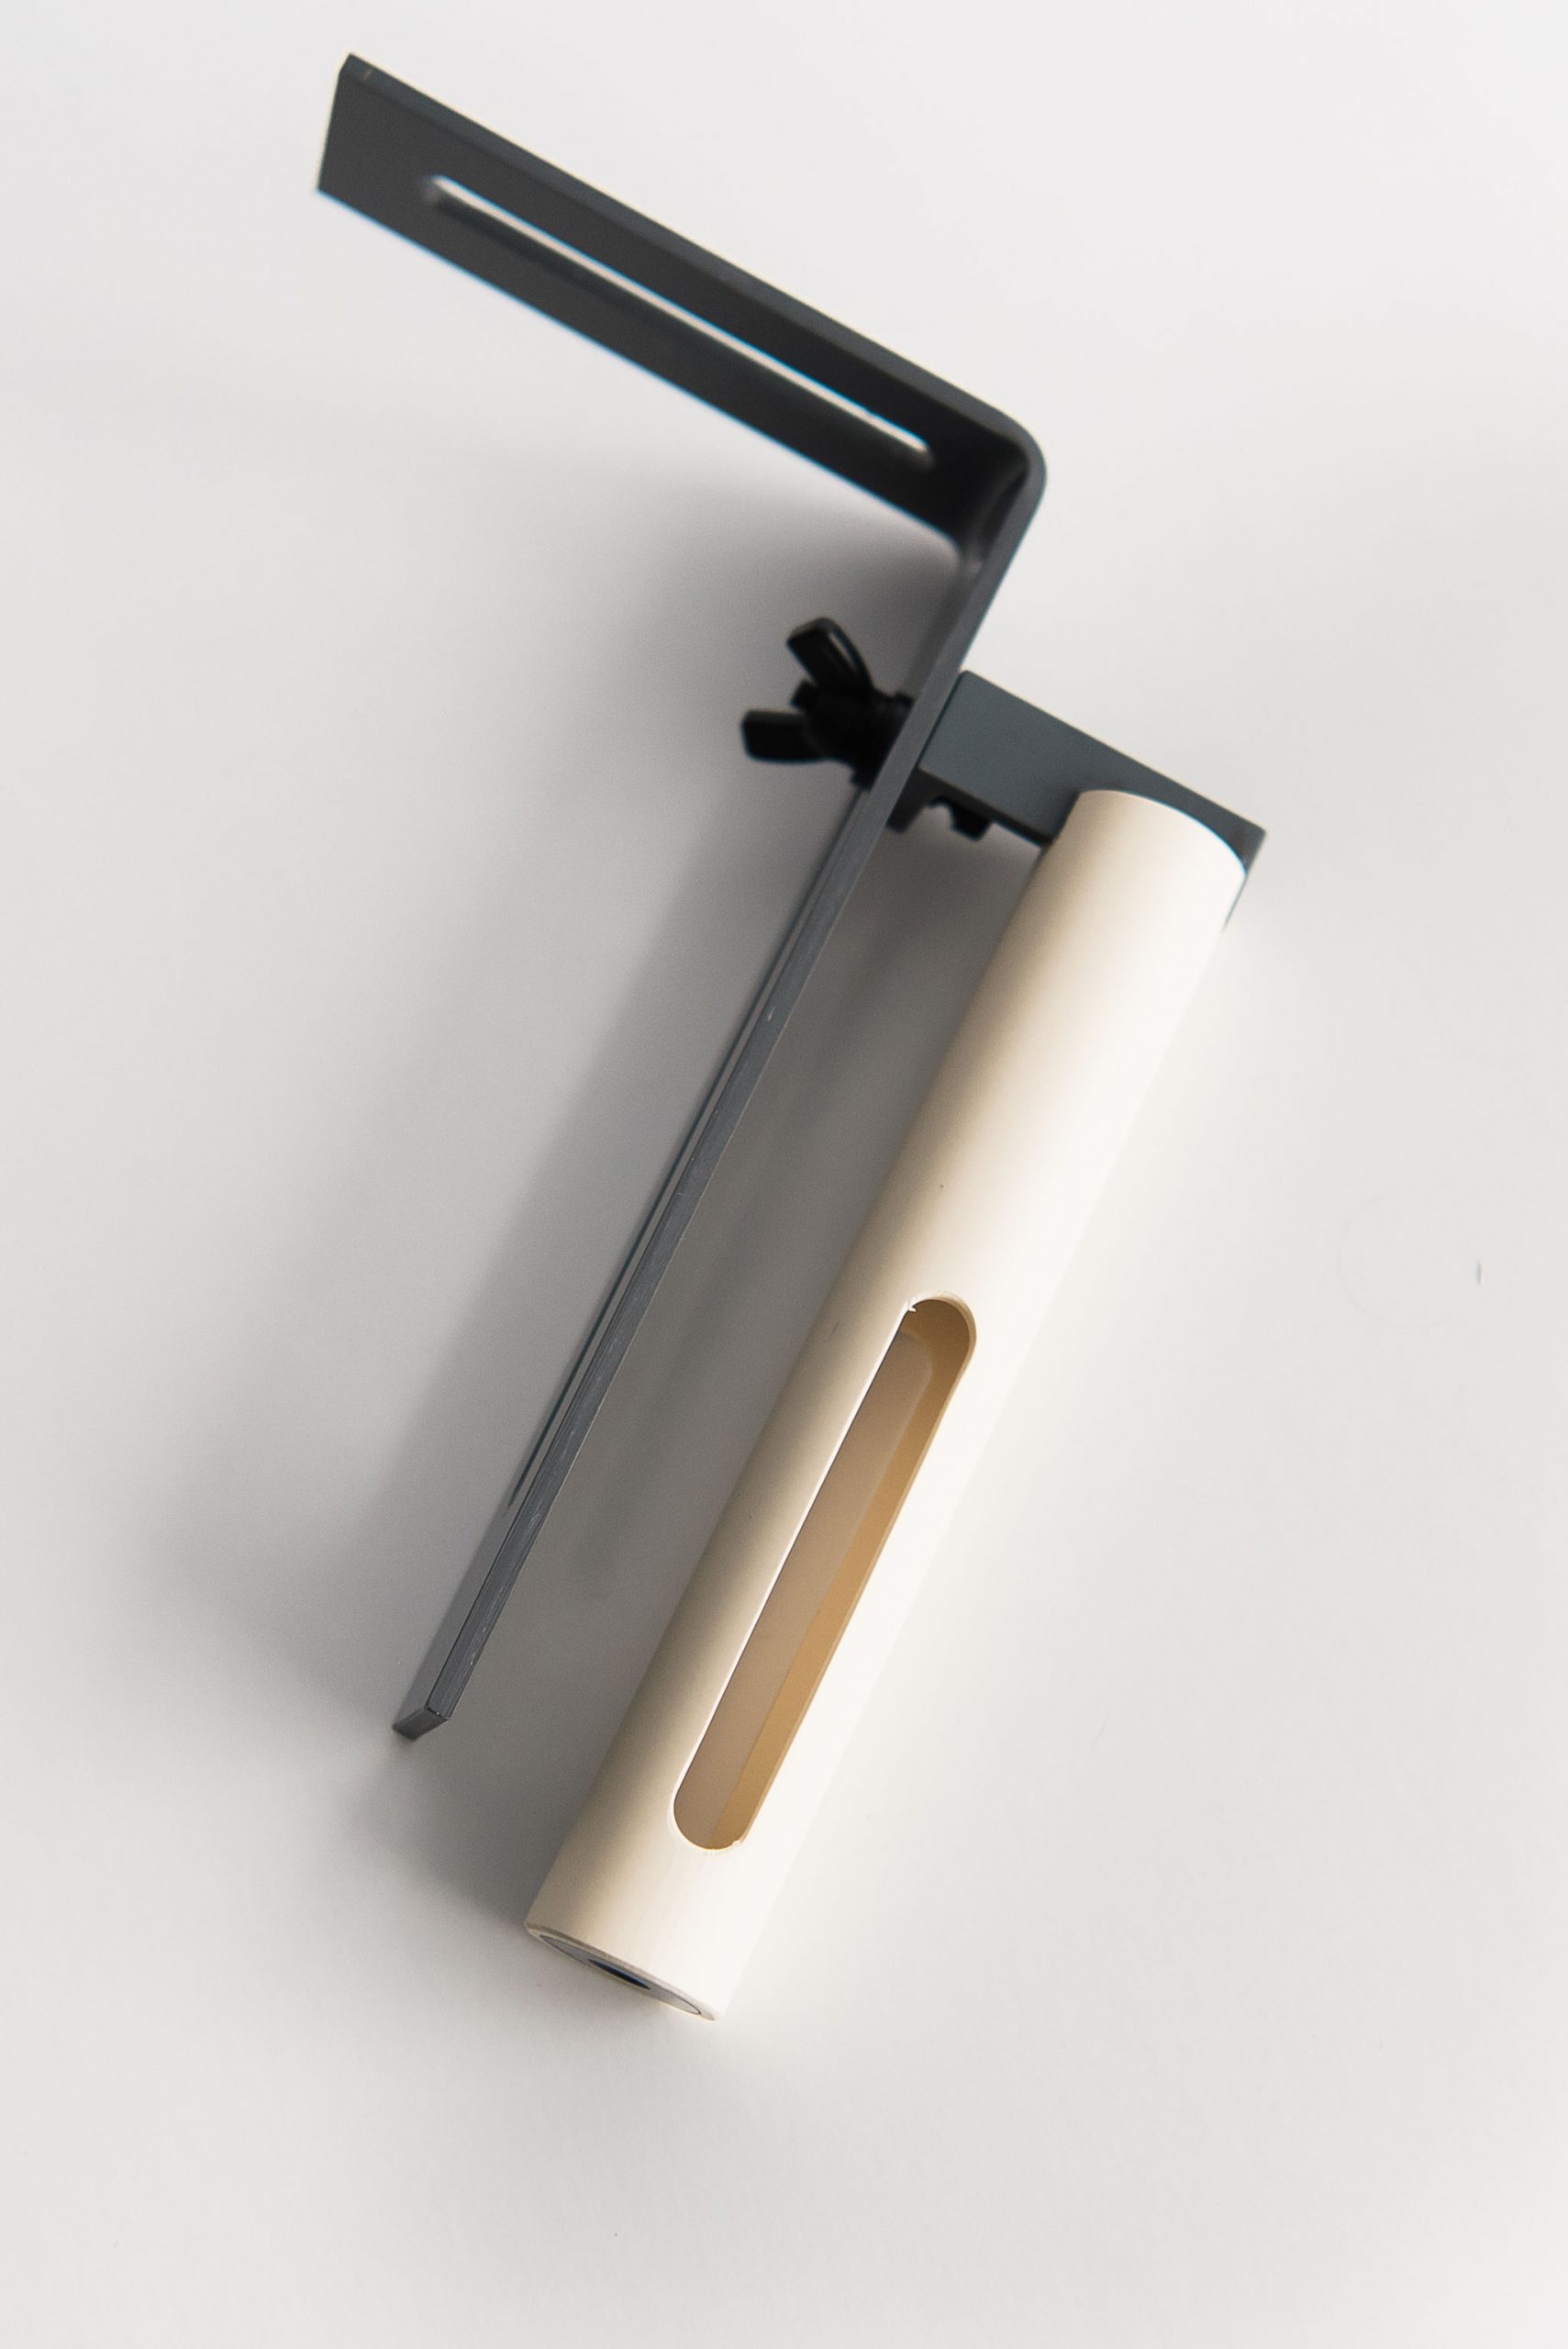
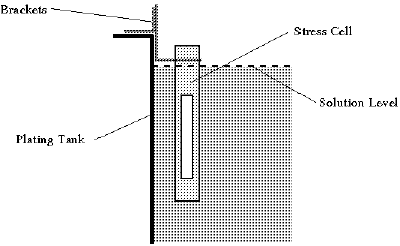
The plating cell PN: 492 is specifically designed for precision deposit stress measurements. It is amenable to both the working tank and in the laboratory. The plating test should be continued until the test strip legs deflect up to 20 units and 100 microinches thick for the most accurate results. Very low stress may show only 1-2 units. The PN: 492 In-site 1 Plating Cell is designed to be used directly in the plating tank (no additional anodes are required), which gives a true representation of stress conditions, or can be used per photo below in a lab setting. This cell is preferred for electroless plating and for the evaluation of precious metal plating baths where a small solution volume is advantageous, particularly when evaluating the effect of addition agents on the internal deposit stress. To carry our a stress test: Mount the bracket to the tank lip in an accessible area with adequate electrolyte circulation, Attach the cell to the bracket, making sure solution will cover the un-coated legs of a test strip inserted in it. The cell can be left in the tank permanently for ease of future testing. 1-Soak a test strip in a soak cleaner solution at 110-120 degrees F. for 30 seconds then water rinse. After the end of the plating cycle, determine deposit stress with the Deposit Stress Analyzer and the formula: S=UKM÷3T. Dimensions, Total length- adjusts from 7″ (172mm) to 11″ (275mm) long x 7/8″(21mm) O.D. Operating temperature … up to 180°F. Note: When Using the PN: 492 Plating Cell in a working tank, do not plate the test strip using the power supply that is being used to plate the other parts, since the production work draws current density values that differ from what the test strip receives. Use a separate current supply, preferably a 0-2 ampere to plate the test strip at a current that approximates the current density for the parts being plated.
Cell P/N
Lexan
PVC
Flow Holes
Pump
Max °F
Approx. Volume
Lab setting
In-tank
785A
Yes
No
Yes
No
212
1 Gal. w/ container
Yes
Yes
785B
No
Yes
Yes
No
360
1 Gal. w/ container
Yes
Yes
785C
Yes
No
No
No
212
1/2 Gal.
Yes
No
800L
Yes
No
No
Yes
212
1 Gal.
Yes
No
800PVC
No
Yes
No
No
360
1 Gal.
Yes
No
492
No
Yes
Yes
No
180
400 Milliliters
Yes
Yes
In-site 1 Plating Cell procedure
2-Immerse in a 10% by volume hydrochloric acid solution for 15 seconds at room temperature then water rinse and alcohol rinse. Dry completely and weigh the test strip- record the weight.
3- Plug the magnetic stir hot plate.
4- Heat the plating bath to the desired temperature.
5-Set the timer for the appropriate plating time.
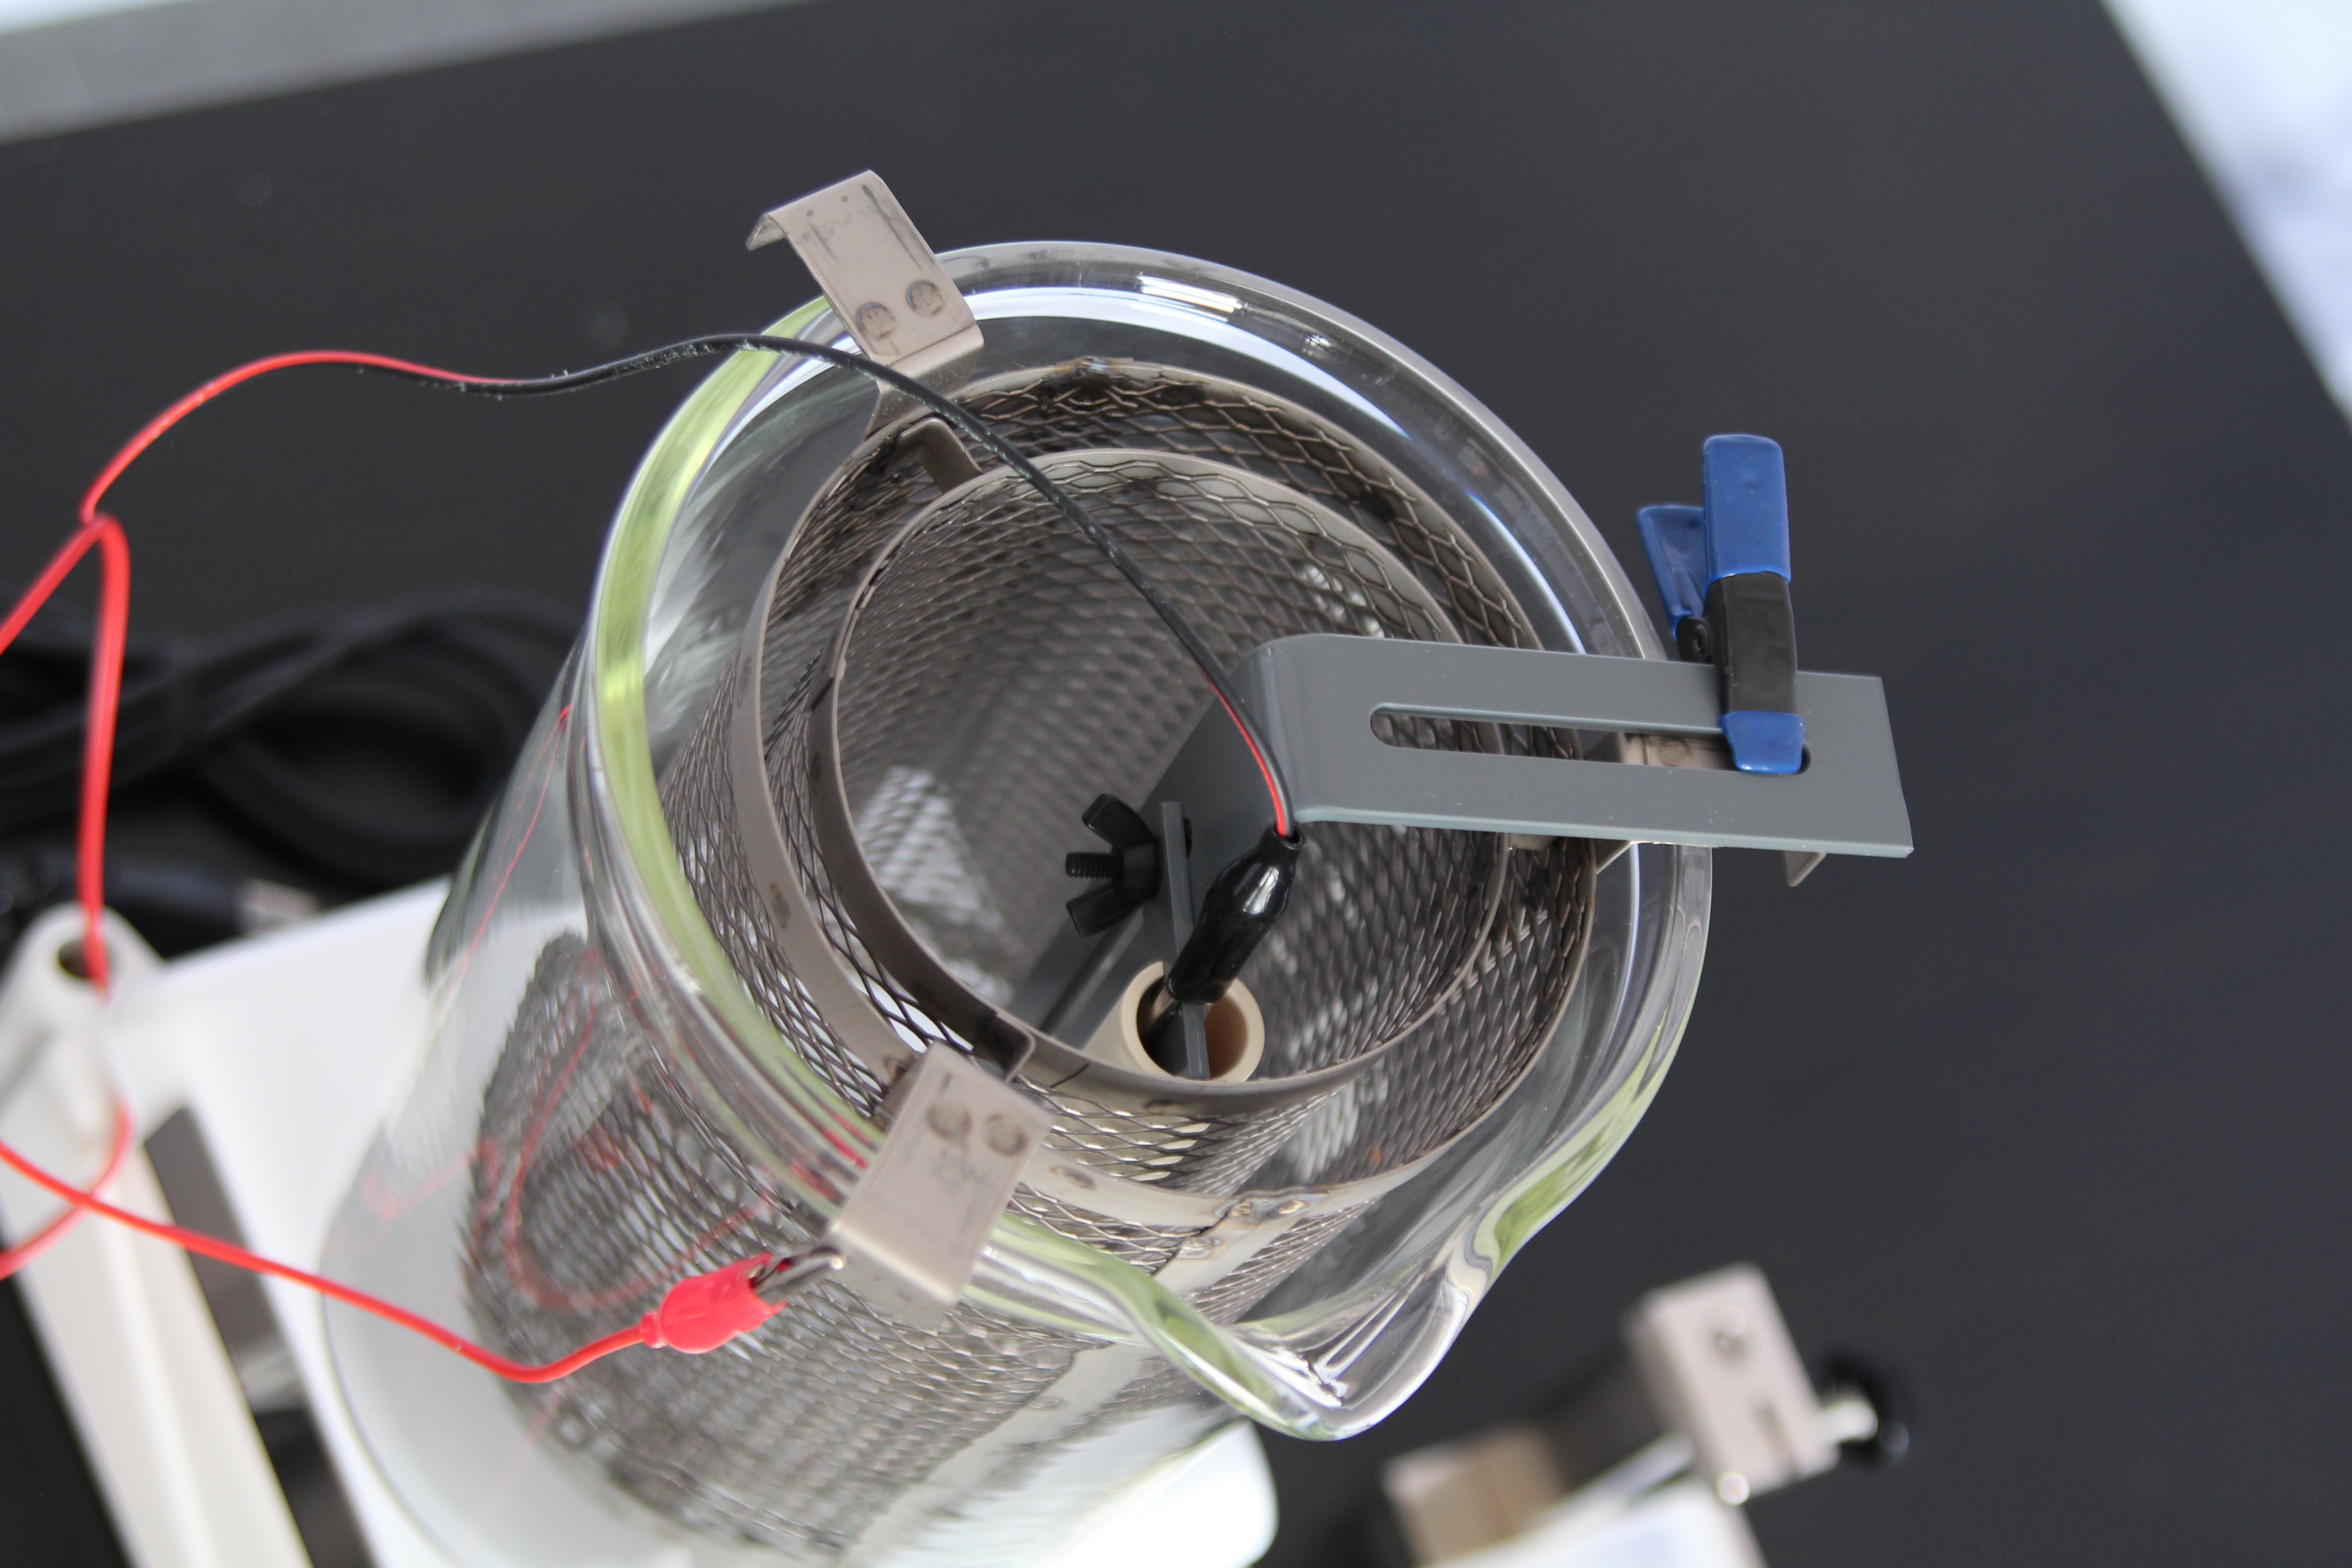
6- Clip with the negative black lead a test strip to the in-site one plating cell. The test strip should be centered in the cell that the windows of the In-site Plating Cell are positioned facing the two anodes. Make certain that the test strips legs don’t protrude through the cell windows but rest on the bottom of the cell. The anodes can be any distance from the cell but must be the same distance and be of the same composition, size, shape and type. The top 1.5″ (38mm) of the plating cell should be out of the solution during the plating test.
7-The positive red lead clip to the anodes.
8-Turn on the power supply and adjust to the desired amperage.
9-When the timer goes off remove the test strip from the cell.
10-Rinse the test strip in water, and then rinse it in isopropyl alcohol.
11-Dry the test strip with a paper towel.
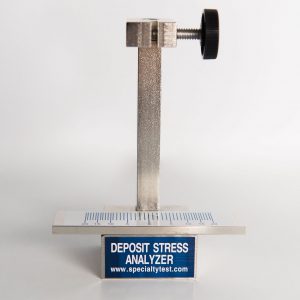
12- Place the test strip on the measuring stand. Read and record the total increments spread on both sides of the zero as the value for U.
13- Weigh the plated test strip and record its weight. Subtract the pre-weight from the post-weight and the difference is W.
It is best to load the test strip with the cell out of the solution because while being dropped into the cell the legs can spread and pass through a window and receive the deposit outside of the plating cell and give a very erroneous reading.